In this post I’m going to give you an overview of the food garden areas, with a few “before & after” progress shots – starting with this shot of our first garden (it’s roughly where the porch is now on the plan below – middle right edge).
First garden, 4 November 2006, in a section of an old tank. Eventually we had three tank sections in a clover-leaf garden. We were living in the shed at the back, which is now our office, TV room, library, etc.

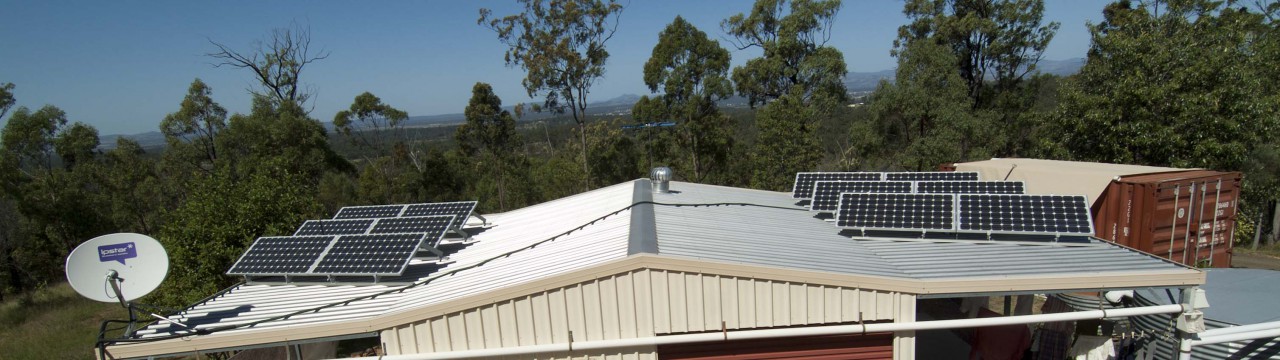
A section of the plan of our infrastructure on Black Cockatoo Ridge
Our current main food growing areas are: the Veg Garden, The Grove, and the Path Garden (left to right on the map above). North is slightly left of up (the house is pretty much E-W), and for a scale, the widest (E-W) dimension of the Veg Garden is 13m and it is 11m N-S.
The area from the house to the Path Garden is more or less flat, but then drops away steeply, so the Path Garden is sort of a terrace.

Looking west toward the outside toilet (in the ugly shadecloth structure)

Sweet Potato crop in western end of Path Garden – early April 2014
Anything we grow in the Path Garden must be either unappetising to the wildlife or secure behind some kind of barrier – hence the collar on the paw paw tree and the net tunnel over the sweet potatoes. The sweet potatoes were growing in an area of around two square metres, though the foliage spreads much further, and yielded 9.5kg despite months of dry weather.

Looking West into The Grove
The Grove is a small area that we never planned to become part of our productive garden. It had a Carob tree, and an unidentifiable citrus tree when we arrived. The citrus didn’t even flower for about 10 years, then when we pruned it one wet year it suddenly burst into flower and yielded 70 pomelo/grapefruit type fruit – absolutely delicious. When I was plumbing in the water tanks for the house I decided to run their overflows into a series of mini-swales that drain into and through The Grove.

Turmeric (early Autumn before they died off in Winter) and a Coffee bush peeking in on the right
Friends gave us a couple of Coffee bushes, so we needed a shady place for them and The Grove seemed just right, and they’ve thrived ever since. Now they’ve been joined by Turmeric and a Mango tree.
No time to go into the details of Fanya Juu terracing now (a later blog post) but here’s the area where they are being developed. This was taken from photo point C in the map above.

Looking West from the outdoor toilet. That’s the Veg Garden on the left
I always regarded this area as too steep to do anything with, even though it has a really good aspect, but when I came across Fanya Juu terracing I decided to give it a go.

First terrace partly constructed
It’s a long way from complete, and doesn’t get very high priority, but whenever I feel like a bit of a work-out I dig some more swale or haul more rocks for the terrace wall. That’s Queensland Arrowroot growing on the terrace – a great potato substitute requiring very little care and attention.
OK, now let’s go into the Veg Garden.

That’s the Veg Garden on the left, behind a tall fence with an electric tape on top to keep the possums out
This area was totally unplanned from the outset. When the house construction started we were suddenly faced with the problem of disposing of the spoil from the foundation excavation, so some of it was dumped here. Then came the problem of what to do with the Lime and Lemon trees that were in the way. No time to think about it, so the back-hoe operator dug them up one at a time and carried them in the bucket to this area, dug a new hole and “planted” them. They thrived! And that gave us the “constraints” for later planning of shadehouse locations.
You can see Shadehouse No.1 in the photo above of the Fanya Juu location – it’s an old temporary carport someone gave us when the cover had perished. Here’s another view from in The Grove.

First shadehouse. The rocky drop beside it gives an idea of the stony nature of the fill that was dumped here
Here’s the location of the next shadehouse as it was in June 2010.
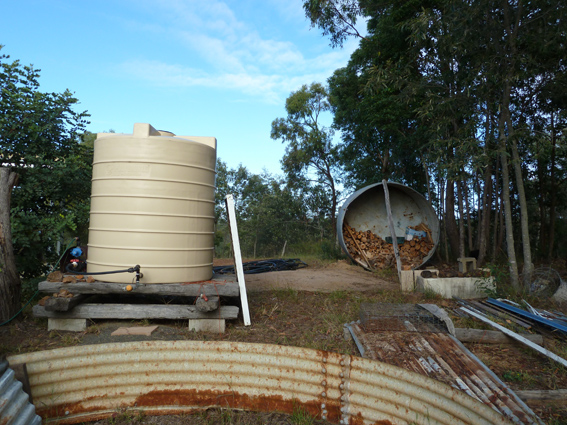
The tank IS vertical – the photographer wasn’t. The First Hugelkultur Shadehouse was constructed about where the sheet of iron is to the right of the tank. That’s our firewood store at the back.
Making an above ground mound of wood and covering it with soil in typical hugelkultur style would result in a very dry bed in our climate, so we dug the base out 300mm deep (about 1 foot), and filled it with old wood, branches, leaves, poultry manure and chip mulch. Then the rocks were sieved out of the soil that had been removed and it was put on top of the base in alternating layers with straw and poultry manure. We did about two metres of the floor of this shadehouse in October 2012 as a trial.
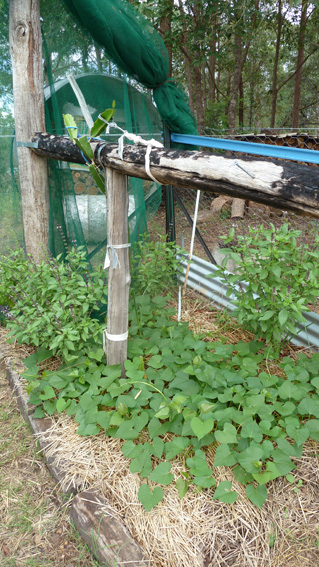 This is what the first crop of Sweet Potato and Thai Basil looked like – with a young Dragon Fruit just peeking over the log trellis.
The plants in this area remained green while others in the garden were drooping from lack of water, so we decided to extend the hugelkultur treatment for the full (5m) length of this shadehouse.
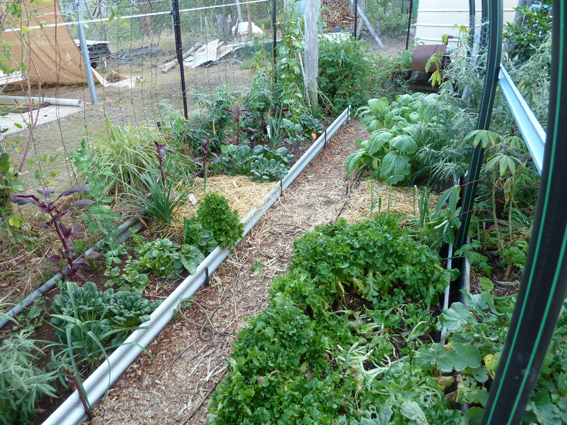
It has been very successful, with continued “drought resistance” and crops of Kale, Gai Laan, Silverbeet, Ginger, Dragon Fruit, Baby Broccoli, Flat-leaf Parsley and Radish. After 18 months the soil level has dropped by up to 200mm in places, presumably as a result of the rotting of the wood underneath (that’s what is supposed to happen), so I’ll be topping it up with fresh soil in the next couple of months.
Our success with this approach inspired us to try it again with Hugelkultur Shadehouse No.2.
Hugelkultur Shadehouse No.2 in early August 2014
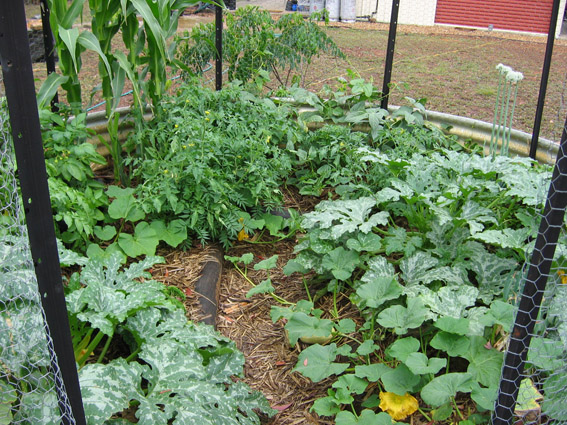
This has been even more productive than No.1, if that is possible. In this photo there are: Loose-leaf Lettuce, Aibika, Spring Onions, Bok Choy, Brazillian Spinach, Cassava, Cherry Tomato, Ceylon Spinach, Tat Soi, Sugar Snap Peas, Clumping Leek, Amaranth, Mugwort and Perpetual Coriander.
After the massive effort in digging out two shadehouse bases, each five metres long and two metres wide, I thought it might be time to try some simple raised beds.

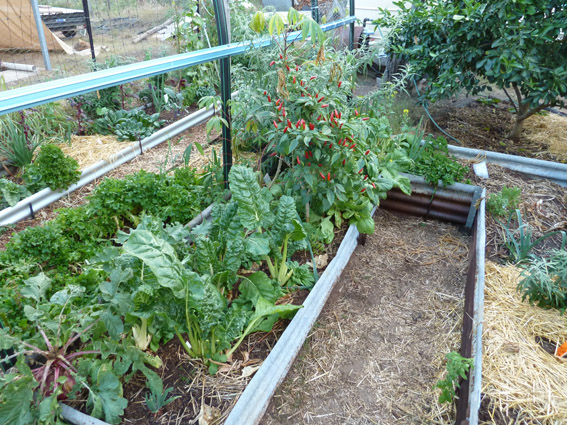
The Chili Shadehouse in mid-December 2013
The Chili Shadehouse is “grafted” onto the previous shadehouse because space in the enclosed Veg Garden is now in short supply. Its raised beds are sitting on rocky fill, and the “soil” is all “manufactured” because, as you are probably starting to gather by now, we don’t have much actual soil on top of the ridge. Or anywhere else on the property for that matter. The recipe for the soil is: 9 parts of sand and silt out of the drainage gutters on our access track; 3-4 parts of fine sieved compost; and 3 parts of chipped matured horse manure. It makes a rich, well drained but water absorbent, “fluffy” loam.
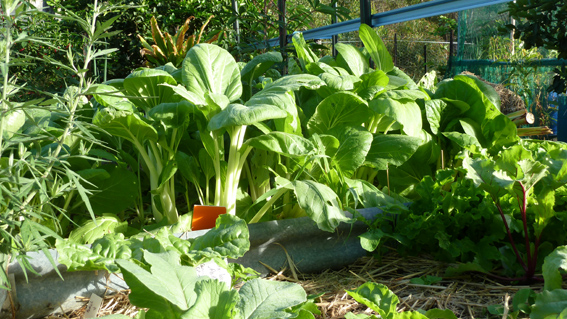
Chili Shadehouse in early August this year
This gives some idea of how productive this shadehouse has been. There are Radish (left to go to seed), Silverbeet, Corn Salad, Chili (growing madly, hence the name of the shadehouse), Pak Choy, Curly Parsley, Brazillian Spinach, Greek Basil, Clumping Leek, Mugwort, Cassava and Aibika. A month or so before this photo I’d harvested Turmeric and Kipfler Potatoes from the empty areas you can see on the right of the above photo.
And, finally, these are the beds across the front of the Chili Shadehouse.
End of Chilli Shadehouse
In late May this year these two beds had Bok Choy, Pak Choy, Beetroot, Silverbeet, Radish, Corn Salad and Loose-leaf Lettuce. With the exception of the Silverbeet that has all been harvested and I’m about to start Spring planting in these beds.
I’ve left out the Lemon Tree Fence Beds and the Composting Toilet Beds (I’ll leave the explanation of that name till another time).
I hope you’ve enjoyed the tour.

Pingback: Pruning Dragon Fruit | Sustainable @ Lockyer Valley