A great information resource

In the process of researching for a post I’m planning on companion planting I came across a great information resource at the website of the University of Tennessee, Institute of Agriculture website.  They aren’t dealing solely with permaculture or organic farming, but much of the material is very relevant to those approaches.

I’ve edited the list of topics that their website links to, to make it a bit more relevant, but when you click on any one of the links below it will put you into their whole list of topics, so you can wander through it as you wish.

Companion Planting Compost Cover Crops
Crop Rotation Disease Management Fruit Production
Grower Resources High Tunnels Native Bees
Food Service Other UT info Pest Management
Seed Saving Soil Management Weed Management

A DIY Compost Thermometer for under $30

I’ve just “upgraded” my compost thermometer.  Previously it consisted of a digital cable-probe thermometer taped to a length of reinforcing rod.  Simple, effective, and awkward to use, and risking breakage of the thermometer and the probe.

DSCF4747_overview_small

Overview of the new compost thermometer

The new model is made almost completely from bits and pieces lying around in the workshop, things from Reverse Garbage in Brisbane, or cheap “off the shelf” parts from plumbing supply shops, supermarkets, or eBay.  The shaft length is 880mm, plenty long enough for reaching into a 1 cu.m. or larger compost heap.

DSCF4750_side view_small_skitch

Side view of the top of the thermometer showing the main components

The thermometer itself is housed in a plastic kitchen container from the local supermarket – cost about $2.  It’s held onto a short length of threaded 25mm PVC water pipe (cost about $3.50 for a 300mm length from Masters Hardware, and I’ve still got the remainder with a threaded end to use for another project) with a 25mm conduit saddle clamp (cost $0.65 from hardware). This screws into a threaded PVC “T” (from my plumbing spares box – cost maybe $2.50) that is closed off on the other side with a 25mm bung (also from my plumbing spares box and not really necessary).  The T joins the shaft via a 25mm nipple joiner (only used in order to achieve a join with the blue part of the shaft – cost maybe $2.00).  The internal diameter of the nipple didn’t quite match the blue part of the shaft, so I cut off a short section of rural polypipe (from a huge heap of off-cuts) and hit it with the heat gun to slip it over the blue shaft.  No glue needed.  The piece of blue PVC conduit came from Reverse Garbage in Brisbane (cost maybe $0.70 – Reverse Garbage is a fantastic place to browse.  I always come away with things I didn’t even know I needed until I saw them).

DSCF4757_screen in case_small

Thermometer screen unit inserted into cut-out in the top of the case

The main thermometer unit with the digital screen on the front is made to be inserted into an instrument panel, so the black “flashing” around the screen is a few mm wider than the main housing, to hide the edges of the cut-out.  On each end of the main housing there is a “lug” which pops past the end of the cut-out to hold the unit in place. I carefully measured the main part of the thermometer housing and marked the outline onto the top of the case, then cut it out using a drill and a hacksaw blade.

Using this waterproof kitchen box helps to keep moisture and dirt from getting onto the back of the thermometer when using it around compost piles.

I got the thermometer from Jaycar in Brisbane years ago for $14.95.  They haven’t had them in stock for quite a while, but you can buy these on the internet or on eBay.  Make sure the cable length is long enough, and that there is an on/off switch (if you want one).  Good idea to check the range too, though the range we are interested in for compost-making is usually within the range of this type of thermometer.  Oven/barbecue thermometers are generally way overpriced and not easily adapted to something like this.

DSCF4763_back of case_small

Conduit saddle clamp holding the case to the short section of threaded pipe.

The case is held onto the threaded pipe with a 25mm saddle clamp made for clamping conduit or water pipe onto a wall. The short bolts I had in my “odd nuts & bolts” box needed large washers because of the large holes in the clamps.  On the other side I used large washers inside the case to spread the force so as not to crack the case.

DSCF4760_inside case_small_skitch

Mounting the case onto the pipe

Because the clamp isn’t tight around the pipe I put a Tek screw (wood thread, not metal) through a hole drilled in the base of the case and into the wall of the pipe.  This needed a largeish washer under the head of the Tek screw so that the pressure of tightening the screw didn’t crack the case.  The hole where the cable exits the case could be sealed with silicone, but I’d be wary of causing condensation inside the case.

DSCF4759_back of meter_small

The back of the thermometer when it’s mounted in the lid of the case.

It’s really easy to pop the lid off the case to press the on/off button on the thermometer.  This prolongs the life of the battery, but I’ve had a couple of similar digital probe thermometers that don’t have on/off switches lying around for months, with the display constantly “on” and their batteries haven’t gone flat yet – you could always take the battery out between uses (store it in the case) if battery life is an issue.  Note the possibility of leaving the probe in the compost heap and recording the maximum and minimum temperatures over a period.

DSCF4761_cable entry_small_skitch

It’s necessary to find a way to get the probe down the shaft of the thermometer

Depending on how you mount the thermometer case on top of the shaft there are many ways of getting the probe on its cable to the other end of the shaft.  I chose to drill a hole in the “T” above the shaft and drop the probe down there.  You need to make sure that if there are any joins in the shaft they do not stop the probe from passing.  I could have (and probably will) put some silicone over this hole – mostly so that if anything snags the cable it doesn’t transfer the strain to the cable-probe join.

DSCF4754_probe_small_skitch

The probe housing on the end of the shaft

The end of the shaft is a metal section that looks like it was once a short, snap-on leg for a piece of equipment (from Reverse Garbage).  The “snap-on” end is crimped to just the right size to fit into one of those disposable applicators that come with silicone tubes (or glue, or gap sealant, etc. etc.) for use in caulking guns.  I cut off the tip of the applicator so that the opening was just wide enough for the probe to be squeezed through, then filled the space behind it with wall panel glue, putting some around the end of the shaft to hold the applicator on.  In theory this should hold the probe securely in place when it is pushed into the compost heap.  I forgot that the glue I used needs contact with air to harden, and putting the applicator straight onto the shaft before the glue was dry meant that it dried very slowly.  I gave the probe a testing “wiggle” a few hours after I’d put the glue in, but the glue was far from dry so that there is now some movement in the probe.  Dumb!  That doesn’t really matter, since I’ve always used a length of conduit to make a hole in the compost heap to insert the probe, so I’ll just keep doing that.  The applicator was free, and the glue was already in the workshop.

It’s not shown in any photos, but I’ve found a bit of communication cable conduit that has just the right internal diameter to slip over the shaft, and fit firmly around the rural polypipe at the top.  This is longer than the shaft, so it protects the probe when the thermometer isn’t being used.

DSCF4765_in compost_small

The compost thermometer in use.

DSCF4768_screen_small

First reading!

The thermometer takes longer (1-1.5 minutes) to reach a steady reading than it did previously, probably because part of the probe is inside the end of the shaft.  This compost heap was reading 54 degC before I gave it its second turning yesterday (about two weeks after the heap was made).  It’s already back up to 46.2 degC, and might get into the 50s though it has already had a high temperature phase in the first week.  I’ll be happy if it sits in the 40+ range for a while.  You can see details of the making of this heap here.

So there it is.  A compost thermometer for less than $30, depending on how much you can make use of “found” and recycled items.

How does it compare to other compost thermometers?

First, it can measure compost temperature, probably at least as accurately as any other compost thermometer.

Second, with the digital thermometer I used it is possible to stick it in the heap, turn the readout on and leave it there for days or weeks, giving a constant reading of temperature as well as recording maximum and minimum temperatures (I haven’t tried this yet, but the function buttons are there on the back of the case).  I haven’t seen a commercial unit which has these functions.

Third it probably isn’t as robust as commercially available compost thermometers, but if it is treated carefully it should last well.  And, at this price I wouldn’t be too unhappy if I had to replace the thermometer unit or a part of the housing or shaft.  If I’d bought a commercial compost thermometer and it broke I’d be very unhappy because of what they cost.

And that brings me to the fourth consideration – cost.  You can get a compost thermometer in Australia from Agricultural Solutions for AUD$160.  A friend of mine bought one recently and he is happy with it, and I’d assume there are others out there for around the same price.

Until at least the middle of 2013 you used to be able to buy a compost thermometer from the Permaculture Research Institute (Geoff Lawton’s organisation) for AUD$294.72 via the online shop on the Permaculture News website.  However that unit no longer appears in the products listing.  It was built like a truck, with an analogue dial like an old fashioned oven thermometer and surrounded by a steel “wheel” grip, but functionally it was still a thermocouple in a shaft probe with a readout – that’s all.  I had some discussion via email with Craig Mackintosh (the PRI website editor) about the price/value issues with that unit, after he rejected a comment I’d submitted to a posting which promoted it and linked to their shop.  I’d described the unit I was using at the time (an early prototype of this one) and it’s very low cost, and in the email exchange Craig asserted that “There is no comparison between the two probes you’re speaking about.”  Well, no, at least not in terms of price.

So there are other units out there, and you can buy one of them off the shelf much easier than making a unit like the one described above, if that suits your available time and resources.  But the option does exist to make a fully functional compost thermometer for a very low cash outlay and at the same time recycle some resources.


Turning the compost heap for the first time

Back in late August I described the process of putting together an 18-day compost heap.  That heap was made on August 26.  When I measured the temperature on August 30 it was just over 50 degC.  I suspected at the time that the temperature had been higher during the four days in between, because of the amount of green vegetable matter used, but I couldn’t be sure of this.

On September 5 I turned the heap for the first time, but before turning it I checked the internal temperature – 52 degC – still within the thermophilic phase of composting(1) where composting is at its most rapid and is bacterially dominated.  The thermophilic phase occurs around 40-65 degC and at these temperatures pathogens and weed seeds will be killed, but “heat loving” organisms will thrive.  Above 70 degC it is necessary to start thinking about reducing the temperature so as to avoid death of the beneficial composting organisms.  This heat is being produced by the metabolic processes of the organisms doing the composting, so it is good to see that they have been hard at work for a week or more.  The fact that it is progressing so well indicates that, during the time I wasn’t taking measurements, the temperature didn’t get into the 70+ degC, or at least not for any appreciable time.

P1060746_050914_just started_small

Part way into turning the heap. It looks a long way away from the original heap, but that’s caused by the camera lens. In fact it is a comfortable reach from one to the other with the long-handled manure fork.

The first surprise was the extent to which the original heap had subsided – it was right up to the top of the frames in the background. I should have expected this, for two reasons: first, the green material was pretty coarse, so there would have been a lot of air spaces in the heap to compact down under the weight of the overlying material; and second, that green material made up a large proportion of the heap, and once it started to break down there would have been a lot of water released, thus reducing its volume.  It is still well above once cubic metre, which is roughly the size required to reach and maintain hot composting.

You can see that a lot of the drier/harder materials have only started to break down, but what isn’t so obvious is that the vast majority of the original green material is difficult to identify – this is after 10 days of composting (in true 18-day compost procedure the first turn would have been after four days, but I did warn in the earlier post that this would be “more or less” 18-day compost).

What is important, but not obvious from the photo is that the heap generally had a good water content, though of course the outer layers (and in this case the bottom layer too) were on the dry side.  I had a hose handy to water both the working face of the old heap and the new heap whenever I came across material that was too dry.  A heap at this stage is too wet if you can squeeze water out of a handful of material, and too dry if a hard squeeze cannot produce any “cohesion” of the material (it doesn’t have to produce wet clumps, just some cohesion resulting from its wetness).  If in doubt, a bit too dry is way better than too wet, because too wet leads to anaerobic processes.

P1060752_050914_fungused chip mulch on top_small

The edge of the new heap as it grows. Key things to note are: (a) the mix of fine and coarse material, (b) that some of the material is loose and dry (I need to water the heap before adding more), and particularly (c) the fungus-matted material on top of the heap.

The first thing I noticed was that there is quite a bit of woody and dry leaf material.  The woody stuff is expected because of the use of coarse mulched tree material from under the power lines in the area.  The bigger bits of this won’t break down fully in an 18-day cycle, but they will during the later “maturing” phase of fungal-dominated composting.  Among these larger components was a matrix of fine material well on the way to becoming compost; this would have derived from the green vegetable waste and the matured broiler manure.

The second thing, and this was a bit of a surprise, was that the 20cm of chip mulch base which had been in the bin for a couple of weeks before I made the heap had become fungus-matted, rather like tempeh (the Indonesian fungus-impregnated soya bean delicacy).  You can see where I’ve thrown this material onto the top of the new heap in the photo above.  Clearly the temperature at the bottom of the heap had not gone high enough to kill off the fungi but was within the mesophilic range (25-45 degC) where fungi are encouraged.  Here’s a close-up of that material.

P1060754_050914_fungus matted detail_small

Fungal-matting of some of the chip mulch which had been on the bottom of the original heap.

This material provides a lovely base of fungal inoculation of the heap, so I made an effort to include it in as many layers of the new heap as possible.  I did worry a bit about the possibility of “matting” of these clumps into impervious layers, rather like paper tends to do in a compost heap if you add too much in one layer and make it too wet.  All the more reason to spread it through the new heap as much as possible.

That reminds me – it is very important when you are making or turning a hot compost heap to keep it “fluffy”, i.e. to incorporate as much air as possible, because without air the (aerobic) organisms you want to do your composting can’t survive.  They will be replaced by anaerobic(2) organisms, and where these dominate they produce intermediate compounds including methane, organic acids, hydrogen sulphide and other substances. In the absence of oxygen, these compounds accumulate and are not metabolized further – many of them have strong odours and some are phytotoxic (poisonous to plants(3)).  One of the things I like about my long-handled manure fork is that it is very easy with a flick of the wrist to turn a forkful upside down as I throw it onto the heap, thus loosening it up as it falls.

P1060762_050914_closed heap_small

Putting the loose straw cover onto the heap to keep it from drying out while still allowing air to circulate.

So that’s it.  With the heap covered with a thick layer of loose straw it can sit and do it’s thing until the next turning.

The open area in the back of the above photo is where I can turn the car when I’ve got a trailer behind.  In the background are the sections cut out of an old water tank that had been through a bushfire.  These now hold maturing broiler manure and horse manure.

(1) There are many good sources of information on the stages of composting and the factors affecting the process.  For a quick overview of the main points you can go to the Cornell Composting web page.

(2)  Misra, R.V., R.N. Roy and H. Hiraoka (2003). On-farm composting methods.  Land and Water Discussion Paper 2. FAO, Rome.  [This publication has details on many composting techniques, including a number of anaerobic methods.  You can download the whole document here].

(3) Brinton, W., & Trankner, A. (1999). Compost maturity as expressed by phytotoxicity and volatile organic acids. In Orbit-99 Conf Proceedings, University Bauhaus Weimar. Retrieved from http://www.solvita.com/pdf-files/voa_eu2.pdf [Gives some idea of the potential for composts to become phytotoxic and the compounds involved].

Starting a batch of 18-day (more or less) compost

I just spent a morning putting together a batch of compost.  Four hours of solid work, from getting the green waste that is the basis if this batch to capping it off with a fluffy cap of straw.

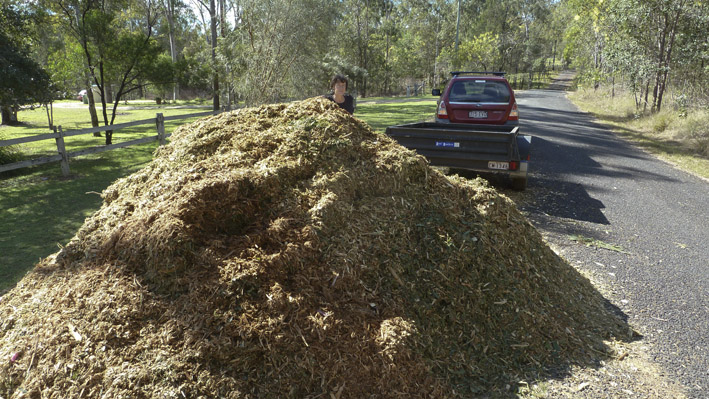
The green waste came from a vegetable packing shed, where I had to line up with all the farm utes picking up a load of cattle feed (we’re in a drought, despite the reasonably good rain in the last couple of weeks).

Having heard figures of up to 40% of horticultural production being rejected because it does not meet supermarket specifications for colour, shape, size, etc., I had always imagined that there must be a huge amount of green waste going to landfill from packing sheds.  It isn’t true, at least not here in the Lockyer Valley.  Some of the big farms that have their own packing sheds also have their own cattle herds, and these get first call on the green waste.  The others generally make it available to the public, and from what I’ve seen very little or none goes to landfill.  The farmers are eager and grateful to have this source of animal feed.[*see additional note below]

When you think about it, these farm animals are eating better than those of us who shop at supermarkets.  Picking of the vegetables commences early in the morning, and the green waste starts coming out of the packing shed around 7.30am.  There might be a bit of waste from the previous afternoon in the first few bins, but from then on it is all stuff that has been picked on the same day – and goes straight from there to the farm or, in my case, straight to the composting organisms.  If you buy vegetables from the supermarket they have gone from the field to the packing shed, to the market or to the supermarket chain distribution centre, generally on the same day, and from there to the supermarket – you will be getting it two or three days after it was picked if you are lucky.

I have a friend who works in a packing shed who takes pride in the work she does to select, trim and pack the vegetables she works on.  When she sees the same vegetables in the local branch of the supermarket her shed supplies her feelings are frequently somewhere between outrage and insult because of the difference in quality she sees compared to when it left her hands.

Anyway, back to the green waste.  Lettuce and cauliflower trimmings today, with a bit of broccoli.  Two bins are tipped into my trailer by the forklift operator, and I quickly move aside to park and cover my load so others can be served.

Back home, reverse the trailer up to the compost production bins (not easy to do in the tight space between stockpiles of horse manure, poultry manure, chipped tree loppings, chip mulch from our firebreak clearing, and sand/silt from the drains on our two kilometres of access track, as well as the last batch of compost.  Set up the water pump and hoses and get out the tools.

DSCF4682_compost veg on woodchip_small

Starting the process

The first layer is already in the compost bin: about 20cm of chip mulch from a tree I had to cut out of the firebreak, covered by a layer of the coarse compost materials from the last batch.  It’s been lying there under a layer of straw for a week or two, and with the rain we’ve had the composting process in the chip mulch is probably well started.  A thick layer of green waste goes on top of that, then a layer of chipped tree loppings that has been stockpiled since last July and is just starting to get fungal strands through the lower parts of the heap.

P1060044_Energex chipmulch_120713

The mountain of chipped tree loppings from under the power lines. We shared it with one of our neighbours and still got eight trailer loads – a full day’s work to move it all.

I wet that layer thoroughly, before adding more green waste and then a layer of decomposing barley straw from a spoiled bale that I’d put behind the compost bin a while back.  That’s wetted down too.  More greenwaste and then a layer of months-old broiler droppings.  In truth, the broiler droppings were always more wood shavings than manure, with a good dash of spilled feed and water, but now they look decidedly woody.

DSCF4687_compost-trailer-chip heap_small

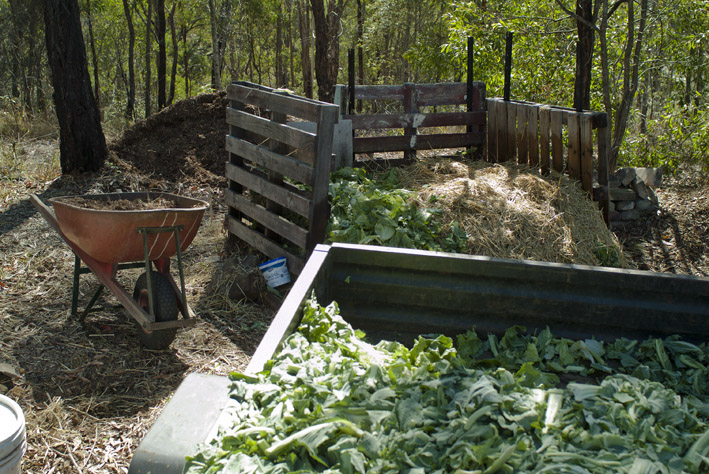
The growing compost heap, and the chipped tree loppings stockpile in the background

I’m kind of wary of broiler droppings because of the short time the birds are on it, leading to a poor ratio of wood to manure, and not much breaking down of the woody material before I get it.  This weathered stuff looks like 80% wood shavings, but I notice that a lot of the woody material is quite soft, and is in a matrix of very fine dark, damp material that might already be compost.  Nevertheless, if I was really intent on making 18-day compost I wouldn’t use broiler droppings, weathered or not.  But I’m not a great fan of the strict 18-day process.  In my experience after 18 days the result can look like compost, but it never smells like it – you know that rich, earthy, good-compost smell?  Doesn’t happen for me in 18 days, even when temperatures and moisture content are all perfectly aligned.  I wonder how often it happens for others.

What I have seen is that the longer an 18-day compost is left to “mature” the better it gets, with more life in it, and generally after three weeks or so of maturing it suddenly gets that earthy smell like forest litter.  From then on it just gets better still, and eventually (if I leave it long enough) has a network of fungal hyphae extending through it.  Not that I always leave it to the fungal stage, and at times I start harvesting the finest sieved component before it smells right, if I’m desperate to make some potting mix or a seedling bed.

DSCF4688_compost-trailer-old heap_small

The last, partly used, batch of compost on the right – covered against the rain over the last few days

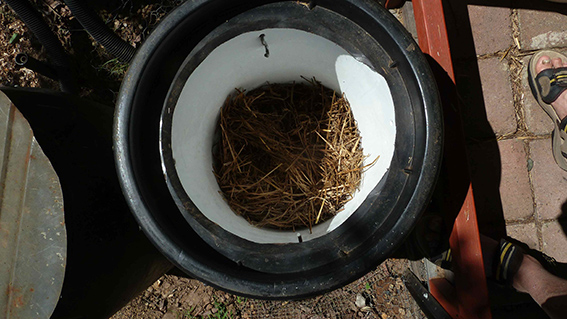
Back to today’s compost.  From there on it’s just a repetition of the same layers and watering, until the green waste load is used up and the compost bin is full.  Then it’s topped off with a thick layer of fluffed up barley straw (to keep it the sun off it while allowing air circulation) and I get out an old tarp to leave beside the bin in case I see heavy rain coming.

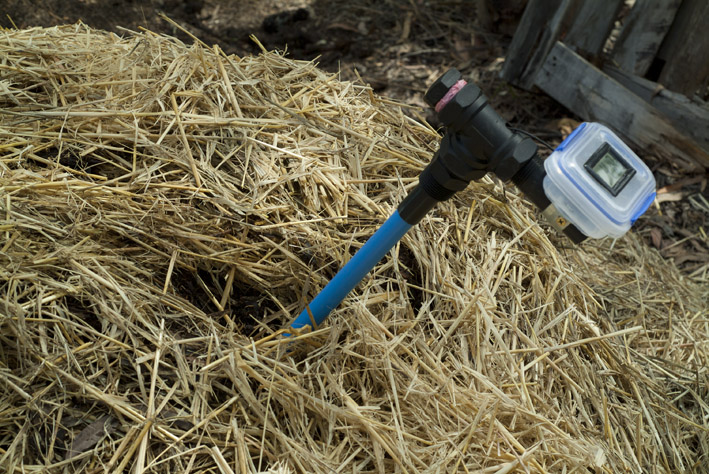
Just to make me feel good I measure the dimensions of the heap and take a final photo.  Volume of the heap: 2.28 cubic metres.  That will drop quickly in the next couple of weeks as the heap settles and water is driven out of the lettuce and cauliflower waste, but it should produce at least 1.5 cubic metres of good compost.

DSCF4692_compost-final heap_small

The finished compost heap

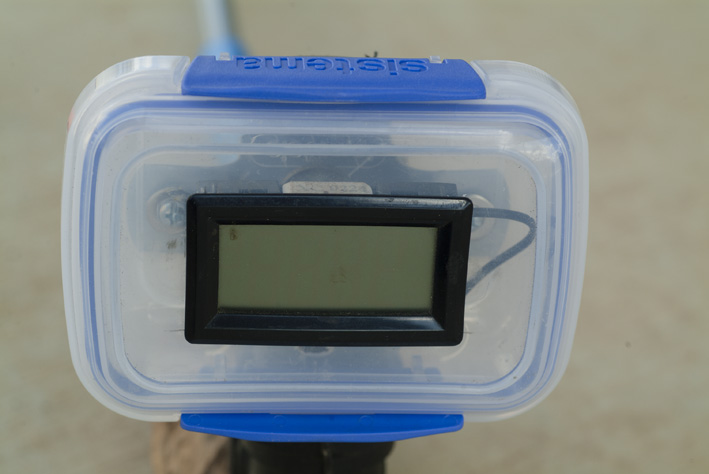
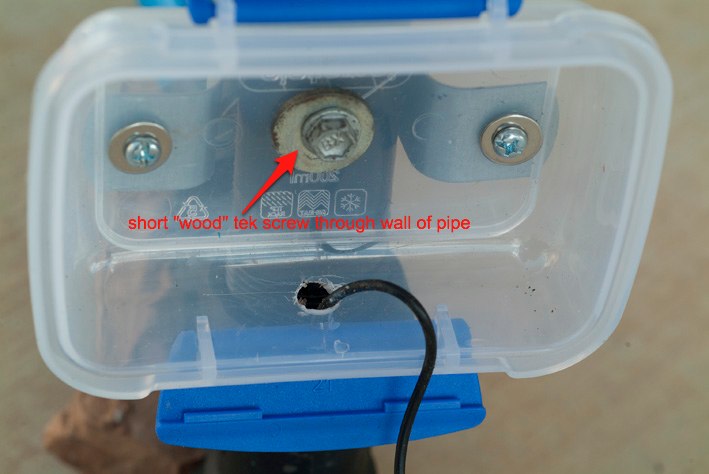
Finally I make a note of the date and give the heap a code on the whiteboard in the workshop, where I will record the temperature of the heap from time to time.  What I want to see is that it gets into the 50-65 degC range for at least a few days, and that it doesn’t go into the 75+ degC region for more than a short period, otherwise I’ll have to turn the heap at that stage to drop the temperature.  Then, once it has done about a week in the 50-65 range I’ll turn it when it’s convenient.  After that, once it drops to around 40 degC (not lower) I’ll turn in every few days to a week, making adjustments to water content and the time between turnings to try to keep it above 40 for two or three weeks.  After that I’ll make sure the last turning has moved it to a place where it won’t be in the way of the next batch or other work, and just keep an eye on it’s progress and of course, the smell.

By the way, do you see the fork in the last photo?  That’s a manure fork, with four tines rather than the three in a pitch (hay) fork.  The tines in the manure fork are closer together, and they are fatter as well as having a bend (or a significant curve) so it’s easier to push them under things on the ground.  Pitchforks are all very well for throwing sheaves of hay onto haystacks, but I find that they don’t pick up the shorter, looser material like compost ingredients or manure very well.  And they’ve (finally) started to become available in Southeast Queensland – at Mitre10 and Trade Tools if you’re looking for one.

* More thoughts on waste in the vegetable production system:

It’s difficult to get a good idea of the level of real wastage in the fruit and vegetable production system.  A Bush Telegraph episode on ABC Radio National on 14 July gave a figure of “$10 billion worth of food” wasted annually by “Australians”, but this isn’t broken down beyond “food”.  Later in the same article they quote figures of “between 20 and 40 per cent of fruit and vegetables grown” being rejected before they reach the shops “because they don’t meet supermarkets’ high cosmetic standards and specifications”.  However I suspect that there are different rates for fruit and vegetables going to landfill.  For example, any fruit with large seeds (avocados) would be unsuitable for stock food, for instance, as are whole potatoes, because of the risk of choking.  Apart from what is diverted to stock food at the farm or packing shed, some of the “unsuitable” fruit and veg goes to charities for distribution to low income families.

What I’m not sure about is whether fruit and vegetables grown under contract to the big supermarkets is prohibited from being sold as a condition of contract.  I’ve heard this said, but haven’t been able to find any evidence one way or the other.  It would be interesting to know.

It would also be very interesting to see a detailed breakdown of the different destinations for rejected fruit and veges.

Soils ain’t just soils – and compost isn’t just compost

Sorry for the long gap between posts.  I’ve mostly been off touring around national parks and permaculture places in northern New South Wales and southern central and southeastern Queensland with my daughter.  Some great walks in spectacular country, and some interesting comparisons between different permaculture demonstration sites.

Not long after we got back I discovered the great blog Living at Gully Grove via a guest post that its author, Chris, wrote on Farmer Liz’s Eight Acres blog about how their family uses permaculture.

When I clicked across to Living at Gully Grove, I found to my delight that, like us, they live in the hilly margins of the Lockyer Valley and clearly face some of the same issues.  It’s always great to find someone who lives in your region who is willing to share their knowledge.

That happy discovery led to an exchange of views via comments on Chris’ blog and the start of a “conversation” about sandstone soils.  As you may know if you’ve been following this blog, our place is steep sandstone country, with many rock outcrops and soil that is made up of sandstone in various stages of decomposition, and generally not more than 60-70 cm deep.  Even that shallow layer of “soil” often has at least half its volume made up of gravel and small rocks.

What passes for soil on a sandstone ridge

What passes for soil on a sandstone ridge

Early on we recognised that one of our main food production challenges was going to be the need to create suitable soil.  To that end we have done all kinds of things, including sieving the rocks and gravel out of huge quantities of the native “soil”, green manuring, mulching, terracing, etc.

So when Chris said:

Have you ever let a garden bed go (ran out of time to keep up to it) and noticed the good soil revert to something like dry potting mix?

The hardest challenge for us hasn’t been building the soil, but rather maintaining it. I notice where we have swales, the soil doesn’t need much of our attention, except where it crosses a sandstone shelf. It only takes a season of hot dry weather, to cook any good soils we don’t maintain.

I knew exactly what she meant.

For us, the challenge hasn’t only been to create good quality soil (and I can’t claim to have satisfactorily cracked that one), but to keep it in good condition.  An apparently well prepared garden bed can start the growing season with lovely fluffy, moist soil that holds together exactly right when squeezed in the hand and produces a good crop.  Then, unless it is constantly maintained, a few months later it is dry, loose and apparently lifeless.  Chris’ description of “dry potting mix” soil hits the nail on the head, particularly if one interprets it as the crap bagged potting mix that supermarkets and garden supply places sell. The plant material in these mixes is generally at best only partly broken down, and there is no evidence that there is, or ever was, life in them.

I’m no expert on soil processes, but I suspect that the coarse material in our “dry potting mix” soils is compost “residue” that has not been broken down. This is probably because (a) the soil was not sufficiently healthy initially, and in particular did not contain sufficient humic matter and soil organisms; (b) when we let the bed go there isn’t sufficient ongoing moisture in the system for biological processes to continue creating and maintaining humic matter; (c) if there isn’t a continuous cover of thick (but air and water permeable) mulch then soil temperatures rise and water content decreases; and, on a sandstone base, there is likely to be significant leaching of nutrients when major rainfall events occur. I have to say though that I have had this problem in some beds that I was actively managing, not just in ones that I’d been ignoring for a few months, but that may have been due to the leaching mentioned in the last point above.

Does the above explanation seem to match your experience / observations?

My way of tackling this problem is still evolving, but it includes:
# keeping a fluffy straw mulch cover on the soil that allows air and water to penetrate, and at the same time significantly reduces drying and insulates from overheating;
# adding green manure to the soil and digging it in. This isn’t the usual “green crop dug in” approach, but a mix of moist and drier (but still living) plant material put through the chipper / mulcher sufficient to make a 25-50mm layer on the surface, then watering it and digging it in;
# adding sieved compost “fines” (containing the humic material) to the soil;
# adding dry horse manure that has been put through the chipper / mulcher to the surface layer.  Processing it this way produces a fine, light fluffy material that holds moisture and gives the soil a great “texture”; and
# to the extent that our water supply allows (we have only tank water), keeping the soil moist, even when the area is not in production.

Good compost of course contains humic material, but can also contain a lot of woody material if you use coarse chip mulch as part of your carbon source.  This is part of the reason it’s a good idea to sieve your compost and put the finer, humic, fraction into the soil, reserving the coarser material for mulch or for feeding the next batch of compost. Unless you already have a healthy soil, there’s not a lot of point in incorporating coarse, only partly broken down, compost material into it.

If you want a good guide to how soil “works” and how to maintain its health, the best book I’ve come across is Toby Hemenway’s Gaia’s Garden (Chapter 4: Bringing Soil to Life). This is by far the best and most practical permaculture text I know. The other good source for soil matters is, perhaps surprisingly, Harvey Ussery’s The Small-scale Poultry Flock (pages 137-144 for soil matters). We have a pretty comprehensive permaculture / organic library but these are the two books I go to first when I have a question, and I seldom need to go past them.

DIY Composting toilet with worms

We decided from the outset that we were going to have a composting toilet.  There were a number of reasons for this, principal among which were that we didn’t want to waste an extremely valuable resource (humanure), and that we don’t have sufficient water to operate a flushing toilet.

The first model that we built, and which we used for more than ten years, was based on one of the 200L barrels used for shipping olives.  These barrels are usually available from places that recycle poly barrels.  The only reason that we stopped using this model was that it gets to be a bit of a chore to move a 200L barrel full of poop when the time comes to change it over.  It was taking me about half a day to undo the connections, replace the full barrel with an empty one, and re-connect it – and I always seemed to put off the change-over until it became urgent (i.e. a very full barrel) and that always seemed to coincide with another urgent priority.  Of course you could always install two 200L barrels side by side (both plumbed to drains and the air vent) and simply move the seat from one to the other, instead of changing over the barrels.  I’ll describe the new system which uses a 60L barrel in another post.

The basic principles of the design we adopted are: a) air is drawn down through “the mass” in order to keep up a supply of oxygen to the composting process and to remove smells through the bottom of the barrel and up to a high vent; b) a sufficient mass builds up to start and maintain an efficient composting process; and c) worms can be introduced to the mass while the toilet is in operation to promote the production of a rich compost loam.

A rich loamy compost with lots of happy worms

The final product – a rich loamy compost with lots of happy worms (the bits of straw don’t indicate that it is not fully composted – the straw was a top layer to help keep the mass from drying out)

In order to reduce the amount of text required, I’ll use photos to illustrate the construction of the unit.  Here’s a view of most of the components associated with the barrel.

Internal fittings and outside connections

Internal fittings and outside connections

In the background is the barrel with, on the left, a connection for extracting air from under the mass, and on the right, a drain for liquids.  The connections are made up from standard plumbing fittings.  In the left foreground is the base which supports the mass, made up of a circular section of 25mm galvanised mesh resting on some sections of plastic pipe – in the centre is some 225mm stormwater pipe (got it cheap as an offcut at the local irrigation supplies place), and some offcuts of 90mm stormwater downpipe (these dimensions aren’t critical, your pipes can be larger or smaller).  These are bolted together with galvanised 6mm bolts that have lasted for ten years, though they are now unrecognizable under a layer of rust.  You can also use reinforcing mesh supports  instead of the pipe sections as in this post on the Milkwood Permaculture site (though this gives a smaller space under the mass). This unit goes into the bottom of the barrel (after the drainage fittings are connected).

In the right foreground is the unit for drawing air down through the mass.  The vertical components are 50mm pipes with many holes drilled in them to facilitate air exchange with the mass (you could use polypipe for this – it’s more flexible and cheaper).  These are bolted onto a short length of 225mm stormwater pipe.  Note that the vertical pipes extend down past the 225mm pipe – the distance they extend downward is the same as the height of the stormwater downpipe lengths under the galvanised mesh on the left. These “legs” go through holes cut in the mesh (visible in the photo), so that the 225mm pipe section sits on top of the mesh.

The photo below shows the two units sitting in the barrel.  Short lengths of polypipe have been inserted into the tops of the vertical pipes to extend the aeration height.  The top ends of these extensions will be pulled to the sides of the barrel just under the top lip and fastened with wire loops through holes in the barrel.  If they aren’t pulled to the sides they tend to snag toilet paper as it is dropped into the barrel.

All components in barrel

All components in barrel

When the barrel is in place and ready to be used a layer of newspaper is placed over the mesh and then a thick layer of straw (we use barley straw) is put on top of that.

The photo below shows the detail of the air outlet.

Air outlet detail

Air outlet detail

There are four parts to this connection.  A male/male connection is screwed into a hole cut in the side of the barrel with an appropriately sized hole saw (keep it close to the bottom, but not so low that it will be lower than the liquid drain) so that the thread protrudes inside the barrel.  A connector (i.e. with internal thread) is screwed onto this inside the barrel so as to clamp the fitting onto the wall of the barrel.  Before tightening this I’ve put some bathroom silicone into the space around the connector on the inside and outside of the barrel to make a good seal.  Reaching to the bottom of the barrel will almost certainly require getting your head and at least one shoulder into the barrel – not easy to do.  I once rolled some distance down the hill with my head and part of my upper body inside the barrel!  The fitting on the outside end of this connection has various names.  My local plumbing supply calls them “dress flanges”.  Anything will do that will fit into the flexible pipe shown in the photo below.

I won’t show the details of the liquid drain.  It’s the same principle as the air outlet, but with appropriately sized fittings, and as close to the bottom of the barrel as you can place it.  Just make sure that the connection between the pipe coming out of the barrel and the drain to take the liquid away is easy to connect and disconnect. After a lot of frustration I settled on camlock fittings (you’ll have to ask your local hardware or plumbing supply place what these are as I don’t currently have a photo of one – there are some details on these fittings here).

Air outlet with flex pipe

Air outlet with flex pipe

The flex pipe can be difficult to source in our area.  Most places sell this pipe with many slots in it for use as a greywater distribution pipe but we need it without any holes.  In the end I got mine from an agricultural machinery parts supply place that sells it as a spare part for seeding machinery.

This pipe is connected to a vertical vent pipe (another length of 90mm stormwater downpipe).

Bottom of vent pipe

Bottom of vent pipe

The fittings here should be pretty obvious.  The reason for the Y-junction at the bottom of the vent pipe is to allow condensation or rainwater to be drained out (in practice it seems to collect here and then evaporate without needing any intervention).

At the top of the vent pipe you’ll need a sewer vent whirlybird. They’re available from plumbing supply places.  You can get one to fit onto 90mm or 100mm stormwater pipe, but I added a short length of wider pipe at the top and got a whirlybird that would fit onto that.  The top of the vent pipe (or all of it) can be painted black so that the sun heats the air in the pipe and starts it moving upward, assisting the whirlybird to draw air down through the mass in the toilet.  The wider pipe at the top just provides a larger volume of air to be heated – I’m not sure whether it makes any difference or not.

Whirlybird on top of a section of wider pipe

Whirlybird on top of a section of wider pipe

That’s about it, apart from putting a seat on top of the barrel.  I used the screw-down flange that holds the top of the barrel in place (photo below) and just trimmed a bit of the edge of it at the front to allow well endowed males to use the toilet without incurring any risk.  Ignore the white insert in the barrel, this is part of a trial of  new approach that doesn’t allow for composting in the barrel but removes the need to wrestle with a full 200L barrel when full.  I’ll describe it in another post.

Top on barrel

Top on barrel

The seat base in the photo below is made from two layers of marine ply.  The top layer is large enough to sit over the top of the barrel and to carry a standard toilet seat.  The lower layer (not visible here) has the same size hole as the upper layer and is glued and screwed to this.  It is just large enough to fit into the screw-on top of the barrel without too much free play.  In this way the seat stays in place without moving around when you sit on it, but can be easily lifted off the top of the barrel.  This doesn’t have to be marine ply, but since it was going to be out in the weather for years I thought it was worth the extra cost.  You can see the toilet seat to the left of the photo and in the lower photo – it came from a recycled timber yard.

Seat base

Seat base

Seat_webHere’s a shot of the two barrels in place.  The “resting” barrel on the left finishes composting while the barrel on the right fills (you can’t really see it because it’s covered with shade cloth – the photo was taken in summer and the shade cloth is needed then to keep the barrel from getting too hot for the worms).

Two barrels in place

Two barrels in place

Once the barrel is about one-third full we add some compost worms from one of our worm farms to it and cover them with a layer of damp soil.  At first we doubted that they would tolerate this environment, but they take to it readily and by the time the barrel is full it has a good population of worms and a lot of the mass has already been broken down by them.

With just the two of us using it the barrel takes six to nine months to fill.  In fact in the later stages the mass is reducing in volume, as a result of the composting process and the actions of the worms, just about as fast as we are adding volume to it.

There aren’t any special precautions to take with this type of toilet, apart from making sure the mass is damp enough to keep the composting going – we keep a spray bottle near the toilet, but seldom need to use it.  People who are taking antibiotics should refrain from using the toilet in case the antibiotic residues affect the composting process, and no non-compostable material (e.g. cigarette butts, tampons) should be put into the barrel.

When the full barrel is first moved to the resting position we put a layer of kitchen scraps on top and cover it with damp newspapers.  This encourages the compost worms that are already in the barrel to come to the top and start work on the top layer. If the worm population isn’t obvious in the top layer within a couple of weeks we add more compost worms.

The resting barrel has a liquid drain and a flexible hose connected to it, but the latter is mostly to keep critters from getting into the bottom section of the barrel.  I always intended to connect this to the vent pipe but never got around to it, and in the end it didn’t seem to matter.  In fact increasing the air flow might have dried out the mass too much.  Keeping the top of the mass damp is one of the few management measures that the resting bin requires.  We generally cover it with a thick layer of wet newspapers or hessian, and try to remember to add water to this occasionally.

You can wait for all of the mass to be composted and then empty the barrel just before changing it over with a new full barrel, but we have found that the worms population will be larger and work more effectively if we regularly take off the top layer of composted worm castings.

I’m happy to answer any questions about this system or to give advice on construction.